I spoken with several people about installing crown molding and they've made me worried, very worried. One said they couldn't quite make the corners meet. Another said to just hire someone to do it. While another said, it's simple, you just have to cut it upside down and backwards. His words still confuse me. So, my first adventure in crown molding begins....
About eight years ago, my parents, for Christmas, purchased us 90 feet of crown molding. It was a great gift as we wanted to put crown molding in our family room. The problem was, I didn't have a miter saw, didn't have the time and I wanted to redo the room, but it just wasn't happening for a while. So it sat, and sat, and sat until now.
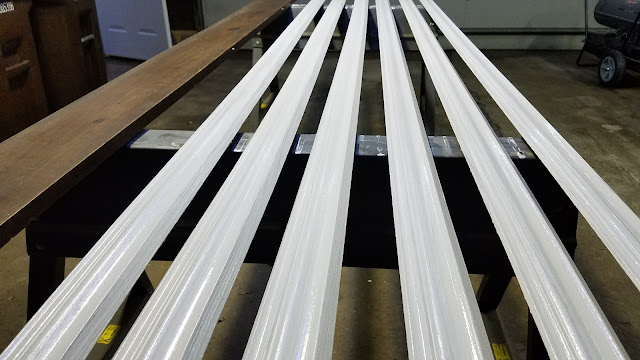
I measured the walls that I would be installing it on, determined I only needed 54 feet of it. So I painted six of the ten foot sections. This gives me very little room for error of painted, but I do have 30 feet of unpainted to work with.
I did do quite a bit of reading from bloggers of others who have successfully installed crown molding. I wanted to learn their tips, tricks and ideas. My wife's favorite tool is Pinterest, so I started there. This was quite handing in finding specific articles, even though Pinterest is basically just bookmarks that are shared. It works great and is a bit easier than searching via the internet for some things.
The best article I found was one titled: Templates Make Cutting Crown Molding A Breeze! - I can't tell you enough how easy these templates made it to visualize every cut I needed to make. I brought my 10" sample cuts into the room to make sure I had the correct cuts in mind, then followed the instructions I wrote on each one.
There are only four cuts you will make: Inside Right, Inside Left, Outside Right, Outside Left. If you read the article I reference in the above paragraph, you can read easier what is written on each template.
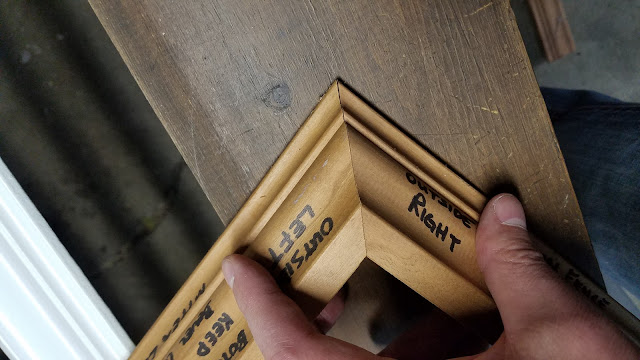
In this photo, I've brought my two outside cuts together for you to see how well they join together. The templates works perfectly as long as your angles are 90 degrees. If they are slightly off, you will need to adjust your angles a bit. There is Crown Molding Angle Chart to help with this! My crown molding sits on the wall at 45 degrees, so I use the 45/45 chart, then find the angle of my corner and adjust the miter and bevel accordingly. It gets you close enough.
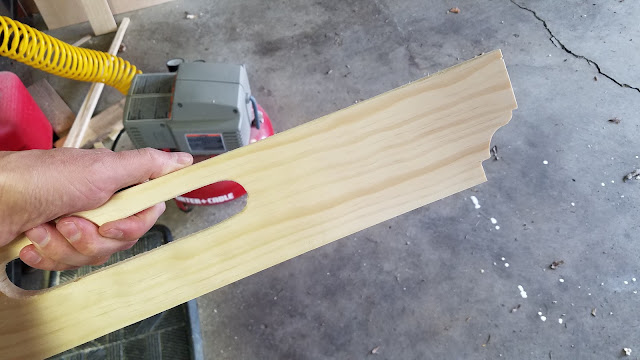
The last article I read was for Making A Jig To Hold Your Crown Molding at the correct angle while you nail it in place. It was brilliant, except my crown molding was so easy to keep at a 45 degree angle.
I never used it for myself while installing. However, since I had ten foot sections and needed help holding the long pieces on the wall, my helper used it while standing flat footed on the floor. So in the end, it was a great tool to use.
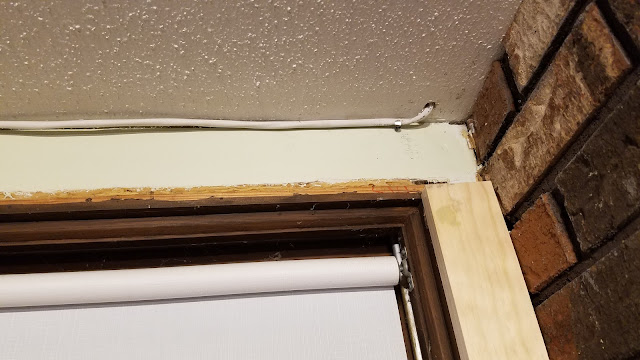
I am running speaker wire behind my crown molding, and this is where it enters my ceiling. I had to stop it short of the fireplace that is also in this room. The rear ceiling speakers will sit just behind the couch when they are installed.
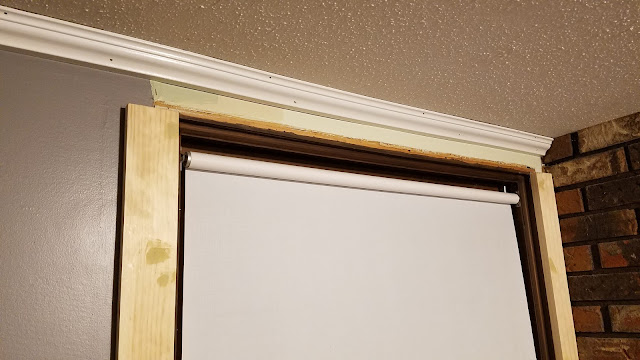
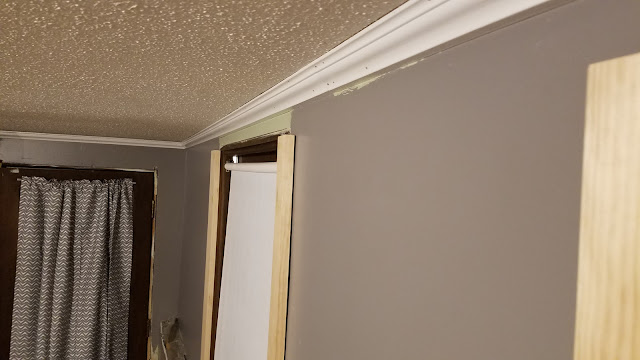
Starting in a lesser viewed corner was a good place to start, so I picked the doorway out of the house as we hardly use this entrance. There is a four foot section above the door and a longer wall of about eighteen feet. With my handy templates in hand, I would be making an Inside Left and an Inside Right corner cuts. The cuts were simple, the corners met up when I pieced them together, it was time to setup the finishing nailer. My first corner was acceptable. The nailer brought the wood deeper into the corner than I realized would happen and gave me a slight gap. Filler will hide and will be invisible at that point.
If you recall in the photo above, this is where the speaker wire enters into the ceiling. Nice, clean and now hidden from sight. I just hope I didn't put a nail through wire!
It was a great start, one that gave me optimism that I could actually finish this part of the project. I installed my first three pieces of crown molding tonight, one corner completed, seven corners to go. Total time to finish the short and long wall was three hours! I hoped it would get faster as I figured out the learning curve. That was however, all the time I had for this evening, as it was getting near 10:30 PM.
About eight years ago, my parents, for Christmas, purchased us 90 feet of crown molding. It was a great gift as we wanted to put crown molding in our family room. The problem was, I didn't have a miter saw, didn't have the time and I wanted to redo the room, but it just wasn't happening for a while. So it sat, and sat, and sat until now.
I measured the walls that I would be installing it on, determined I only needed 54 feet of it. So I painted six of the ten foot sections. This gives me very little room for error of painted, but I do have 30 feet of unpainted to work with.
The best article I found was one titled: Templates Make Cutting Crown Molding A Breeze! - I can't tell you enough how easy these templates made it to visualize every cut I needed to make. I brought my 10" sample cuts into the room to make sure I had the correct cuts in mind, then followed the instructions I wrote on each one.
There are only four cuts you will make: Inside Right, Inside Left, Outside Right, Outside Left. If you read the article I reference in the above paragraph, you can read easier what is written on each template.
In this photo, I've brought my two outside cuts together for you to see how well they join together. The templates works perfectly as long as your angles are 90 degrees. If they are slightly off, you will need to adjust your angles a bit. There is Crown Molding Angle Chart to help with this! My crown molding sits on the wall at 45 degrees, so I use the 45/45 chart, then find the angle of my corner and adjust the miter and bevel accordingly. It gets you close enough.
The last article I read was for Making A Jig To Hold Your Crown Molding at the correct angle while you nail it in place. It was brilliant, except my crown molding was so easy to keep at a 45 degree angle.
I never used it for myself while installing. However, since I had ten foot sections and needed help holding the long pieces on the wall, my helper used it while standing flat footed on the floor. So in the end, it was a great tool to use.
I am running speaker wire behind my crown molding, and this is where it enters my ceiling. I had to stop it short of the fireplace that is also in this room. The rear ceiling speakers will sit just behind the couch when they are installed.
Starting in a lesser viewed corner was a good place to start, so I picked the doorway out of the house as we hardly use this entrance. There is a four foot section above the door and a longer wall of about eighteen feet. With my handy templates in hand, I would be making an Inside Left and an Inside Right corner cuts. The cuts were simple, the corners met up when I pieced them together, it was time to setup the finishing nailer. My first corner was acceptable. The nailer brought the wood deeper into the corner than I realized would happen and gave me a slight gap. Filler will hide and will be invisible at that point.
If you recall in the photo above, this is where the speaker wire enters into the ceiling. Nice, clean and now hidden from sight. I just hope I didn't put a nail through wire!
It was a great start, one that gave me optimism that I could actually finish this part of the project. I installed my first three pieces of crown molding tonight, one corner completed, seven corners to go. Total time to finish the short and long wall was three hours! I hoped it would get faster as I figured out the learning curve. That was however, all the time I had for this evening, as it was getting near 10:30 PM.





0 comments:
Post a Comment