
Showing posts with label Remodeling. Show all posts
Showing posts with label Remodeling. Show all posts
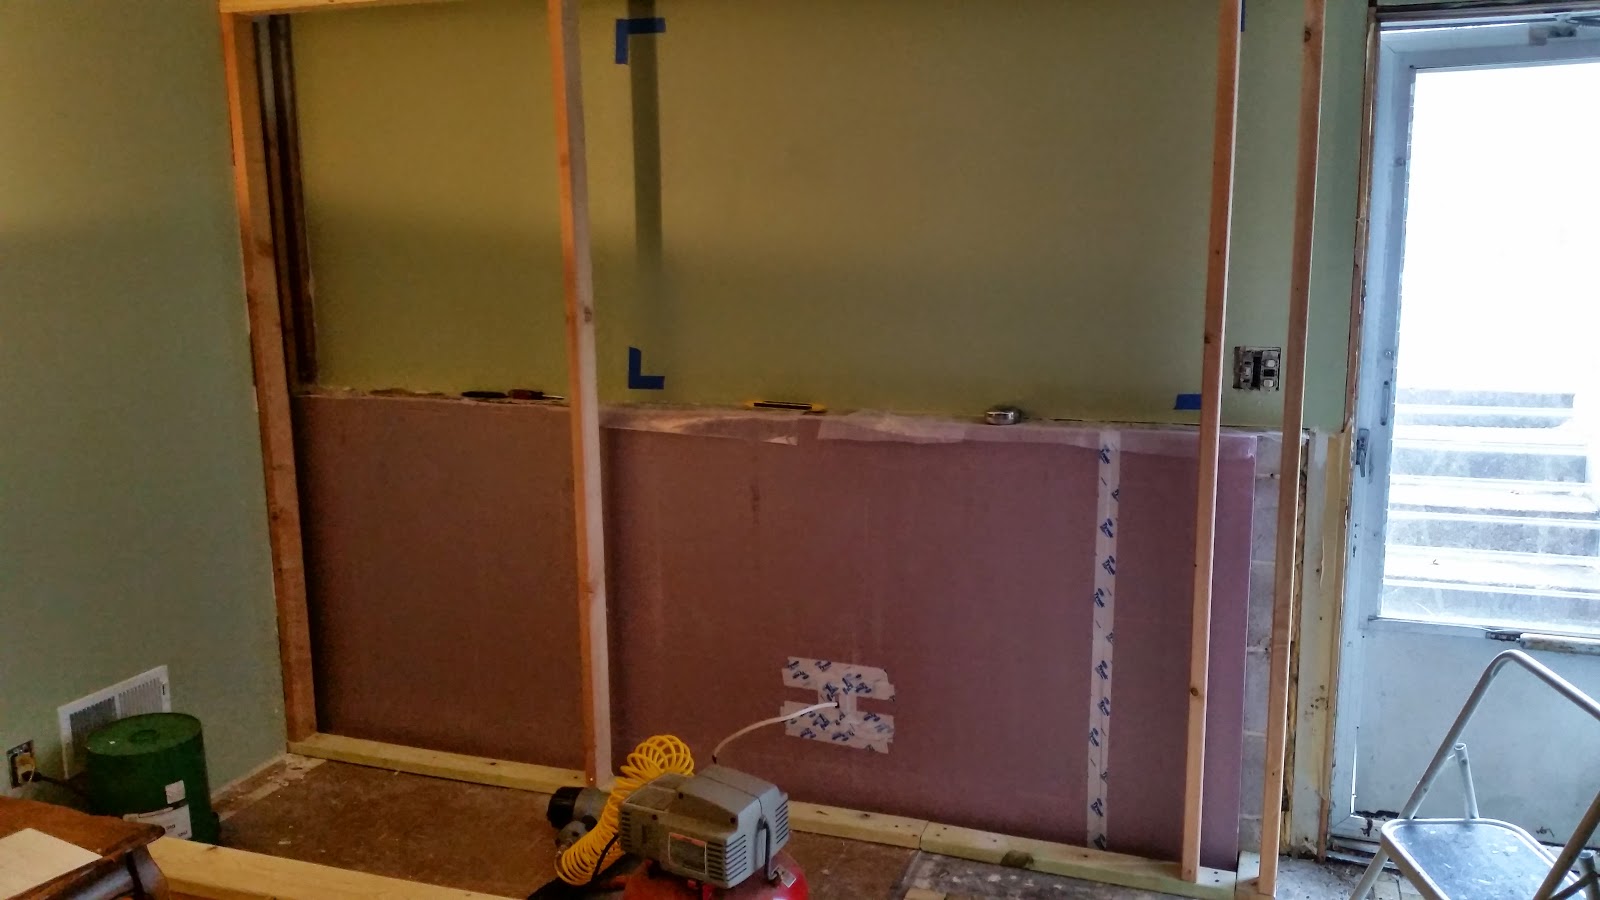
I am getting close to adding the Sheetrock to the new wall, but one last thing to do is call the cable company to install a new line where the TV is going to reside. This proved to be more difficult than I anticipated since they normally install the cable lines in an older house like mine by drilling on the outside of the house wall. It's simple and quick for them, but it's ugly for me to have a black coax cable run along the outside of my house.
I currently have one cable line running from the back of my home, around the side, over a door that leads into this family room, then finally it jets into my bedroom wall. This side of the house has my drive way and is the second most visible side of my house. Since I am moving my TV from the back of my house to the side of my house, that means another coax cable will be run from the back of the house, over the door and another hole drilled fifteen feet from my other coax cable outlet.
My plan is simple, get rid of all of the cables that run on the second most visible side of my home by drilling in the back of the house and into the ceiling where cable lines can be hidden from sight, like they should be. Plus, I want a second line to run through the new wall and into my bedroom. This will eliminate all of the visible cable lines on the side of my house.
I had Omar out to my house. There was a drizzle of rain coming down. Just enough to get everything wet and stay wet. I told Omar the plan I had for where I wanted the cable to be run. He looked at me puzzled until I showed him the open stud wall I had just built. It actually to some convincing for him to do what I had requested. He took a deep breath and left for his van to get supplies.
He came back with a tape measure, his drill, and an 18" tube that he normally uses to pass the cable through the wall. when I looked at the tube, I knew that wouldn't work since he needed to pass the cable at least four feet to the opening in the ceiling, but I let him try his method first. He drilled the hole, attached the coax cable to his 18" tube, and inserted into the freshly drilled hole.
Omar then came inside the house, looked at how far he needed to go and went back to his van. He returned with nothing, but told me he needed a longer tube to pass the cable. Ah ha! It was Omar's lucky day as I just happened to have a 12 foot tube for doing that very thing! We worked together, him from the outside, me standing on my ladder, and there it was, a new cable line exactly where I wanted it to be.

Now this I wasn't expecting, but he assured me it would be just fine. He only ran one line into the house, then split it here. My only concern is what if that line, or either line goes bad in the future, how does it get repaired? I know the answer, a new line run along the side of my home.

This is the beautiful part of the cable line. All that is visible now is this small little cable line. The rest is hidden in the decorative corner piece on the house. I couldn't be happier. You did great work Omar, thank you.

I currently have one cable line running from the back of my home, around the side, over a door that leads into this family room, then finally it jets into my bedroom wall. This side of the house has my drive way and is the second most visible side of my house. Since I am moving my TV from the back of my house to the side of my house, that means another coax cable will be run from the back of the house, over the door and another hole drilled fifteen feet from my other coax cable outlet.
My plan is simple, get rid of all of the cables that run on the second most visible side of my home by drilling in the back of the house and into the ceiling where cable lines can be hidden from sight, like they should be. Plus, I want a second line to run through the new wall and into my bedroom. This will eliminate all of the visible cable lines on the side of my house.
I had Omar out to my house. There was a drizzle of rain coming down. Just enough to get everything wet and stay wet. I told Omar the plan I had for where I wanted the cable to be run. He looked at me puzzled until I showed him the open stud wall I had just built. It actually to some convincing for him to do what I had requested. He took a deep breath and left for his van to get supplies.
He came back with a tape measure, his drill, and an 18" tube that he normally uses to pass the cable through the wall. when I looked at the tube, I knew that wouldn't work since he needed to pass the cable at least four feet to the opening in the ceiling, but I let him try his method first. He drilled the hole, attached the coax cable to his 18" tube, and inserted into the freshly drilled hole.
Omar then came inside the house, looked at how far he needed to go and went back to his van. He returned with nothing, but told me he needed a longer tube to pass the cable. Ah ha! It was Omar's lucky day as I just happened to have a 12 foot tube for doing that very thing! We worked together, him from the outside, me standing on my ladder, and there it was, a new cable line exactly where I wanted it to be.

Now this I wasn't expecting, but he assured me it would be just fine. He only ran one line into the house, then split it here. My only concern is what if that line, or either line goes bad in the future, how does it get repaired? I know the answer, a new line run along the side of my home.

This is the beautiful part of the cable line. All that is visible now is this small little cable line. The rest is hidden in the decorative corner piece on the house. I couldn't be happier. You did great work Omar, thank you.

In my last post I thought I had finalized the stud wall frame, however I have had to make a couple of changes, albeit minor. When I started pulling the speaker wire through the frame, I realized I hadn't left room for the center channel speaker which will reside below the HDTV. I had to remove one of the shorter studs below the recessed box are to accommodate the necessary gap. I also had to move the electrical line over to the next stud.

When it's all said and done, below the HDTV I will have a front left and right speaker plus a center channel. There will also be a rear left and right speakers to complete the 5.1 surround sound. Do I need to have 7.1 sound? Would I notice a difference in a room this small? We opted to stick with the 5.1 sound, which is more that what we currently have setup.
The last change I had to make the the stud wall, if your keeping score, this is change number three. I purchased a couple of 2'x2' DRIcore subfloor boards as we will use this product for our basement flooring. It will get my flooring material off of the cold concrete. It will also give us a moisture barrier and the floor wont be as cold to walk on any longer. All this for losing a half inch of space, what's not to like? So, after realizing the bottom of the Sheetrock will need to be a half inch higher than the flooring, I needed to have a second sill plate to the bottom of the structure. There wouldn't be any wood available for me to screw the Sheetrock too if I didn't scab in a second level of boards.

So that's it, the wall is finalized now. I have my speaker wires run, a CAT6 network cable from the server room is in place, and I've added steel plates to protect the wires running through the studs. I'm not sure what those are officially called. They prevent you from drilling into your wires after you cover them up with Sheetrock.
There is one last thing to work on for this blog post, moving the light switches to the new wall by the door. After removing the old cover for the switches, it looked like a mess. I have three lights here, one for this room, one for the light just outside of the door and one to control the lights on my garage. Two of these lights are three way switches, so many wires!

Let's see, this one with the two orange wires controls the ceiling light in this family room.

The other combo switches with the blue wires control the outside light and the garage light. Everything is moving over to that fancy 3-gang blue box.

So dirty and messing inside. These three light switches are also had two fuses running to them. The separate one being the garage light.

Ahh, it's so clean looking now and no more combo switch. The outside switches are my two 3-way switches and the center single throw switch controls the light outside the door.

When it's all said and done, below the HDTV I will have a front left and right speaker plus a center channel. There will also be a rear left and right speakers to complete the 5.1 surround sound. Do I need to have 7.1 sound? Would I notice a difference in a room this small? We opted to stick with the 5.1 sound, which is more that what we currently have setup.
The last change I had to make the the stud wall, if your keeping score, this is change number three. I purchased a couple of 2'x2' DRIcore subfloor boards as we will use this product for our basement flooring. It will get my flooring material off of the cold concrete. It will also give us a moisture barrier and the floor wont be as cold to walk on any longer. All this for losing a half inch of space, what's not to like? So, after realizing the bottom of the Sheetrock will need to be a half inch higher than the flooring, I needed to have a second sill plate to the bottom of the structure. There wouldn't be any wood available for me to screw the Sheetrock too if I didn't scab in a second level of boards.

So that's it, the wall is finalized now. I have my speaker wires run, a CAT6 network cable from the server room is in place, and I've added steel plates to protect the wires running through the studs. I'm not sure what those are officially called. They prevent you from drilling into your wires after you cover them up with Sheetrock.
There is one last thing to work on for this blog post, moving the light switches to the new wall by the door. After removing the old cover for the switches, it looked like a mess. I have three lights here, one for this room, one for the light just outside of the door and one to control the lights on my garage. Two of these lights are three way switches, so many wires!

Let's see, this one with the two orange wires controls the ceiling light in this family room.

The other combo switches with the blue wires control the outside light and the garage light. Everything is moving over to that fancy 3-gang blue box.

So dirty and messing inside. These three light switches are also had two fuses running to them. The separate one being the garage light.

Ahh, it's so clean looking now and no more combo switch. The outside switches are my two 3-way switches and the center single throw switch controls the light outside the door.
The best of my planning for this project, I have to keep reminding myself to take photos as I progress. So when I realized I hadn't taken any project photos yet, I had the 2" insulated foam board in place. I needed nine feet of board and the 4'x8' boards left me a foot short, thus I had to purchase to sheets to span the wall at $25 a piece. At least I'll have a little extra for the next wall that needs insulation. I also have the new electrical line routed through the foam board and a few upright boards in place. Quite a bit of work before I took the first photo of the day.

The studs went up rather easy. Nice and simple, however, once I was completed, I realized I had made an error. On either side of the area for the HDTV, I left a seven inch wall frame, however, in the corner of my studs, I did not leave the seven inches of wall. The left opening will house decorative items with shelves, but I need it to be uniform.

It was a simple retrofit correction, but it looks so much better already. I scabbed in another full height stud to complete the symmetric look. It must have been a cold night as I have three bundles of wood waiting for me to carry over to my fireplace on the other side of this room.

One last photo of the stud frame. I have also expanded the electrical box from one outlet into two outlets, giving me four plugins for the lower wall. I'm also routing power up to the television area and will have a single outlet the top portion of the wall. You can just make out the wire sitting on top of the 2" foam board. It will sit there until I build the recessed box is in place.


This was the first real progress I have made on the new wall construction. I have just purchased speaker wire and will get that in place. Then I need to deal with moving the light switches as they are currently behind the wall.
The studs went up rather easy. Nice and simple, however, once I was completed, I realized I had made an error. On either side of the area for the HDTV, I left a seven inch wall frame, however, in the corner of my studs, I did not leave the seven inches of wall. The left opening will house decorative items with shelves, but I need it to be uniform.

It was a simple retrofit correction, but it looks so much better already. I scabbed in another full height stud to complete the symmetric look. It must have been a cold night as I have three bundles of wood waiting for me to carry over to my fireplace on the other side of this room.

One last photo of the stud frame. I have also expanded the electrical box from one outlet into two outlets, giving me four plugins for the lower wall. I'm also routing power up to the television area and will have a single outlet the top portion of the wall. You can just make out the wire sitting on top of the 2" foam board. It will sit there until I build the recessed box is in place.


This was the first real progress I have made on the new wall construction. I have just purchased speaker wire and will get that in place. Then I need to deal with moving the light switches as they are currently behind the wall.
So it begins, a bit of demolition to prep the wall for the new addition. I didn't recall taking a before shot of the floor, but thankfully I did. I'm building the new wall out about eleven inches total. Since we live in a partial basement, the foundation splits up the basement walls. So the top portion of the wall will be eleven inches and the bottom portion of the wall is about six inches out.

The old tile removed very easily. I'm just removing enough to get my wall frame in place. Later on I'll remove the rest of the tile. I've never understood the logic of the original tile placement by this door. The previous owners had furniture over part of the tile. We had done the same, mainly because we rarely use this door.

I only need to remove the lower portion of the wall. There isn't any insulation on any of the lower walls in the basement, so I'm slowly adding it to all of the walls I've redone.

I'm also removing part of the ceiling to the first floorboard. It is exactly where I want the new wall to go up, so it couldn't have been in a better place. This is it, all of the demo that needs to happen for the new wall to take shape.

I'm ending this day by screwing in the first board to the cement floor. Treated lumber in case there is any moisture. Trust me, we have had water in the basement with very heavy rains.


That is it, day one is completed. Not a very complicated day, but just enough to get the project up and running. Next comes the frame building and insulation.

The old tile removed very easily. I'm just removing enough to get my wall frame in place. Later on I'll remove the rest of the tile. I've never understood the logic of the original tile placement by this door. The previous owners had furniture over part of the tile. We had done the same, mainly because we rarely use this door.

I only need to remove the lower portion of the wall. There isn't any insulation on any of the lower walls in the basement, so I'm slowly adding it to all of the walls I've redone.

I'm also removing part of the ceiling to the first floorboard. It is exactly where I want the new wall to go up, so it couldn't have been in a better place. This is it, all of the demo that needs to happen for the new wall to take shape.

I'm ending this day by screwing in the first board to the cement floor. Treated lumber in case there is any moisture. Trust me, we have had water in the basement with very heavy rains.

A wider shot of the completed demolition with the first board in place ready for the the new wall.

That is it, day one is completed. Not a very complicated day, but just enough to get the project up and running. Next comes the frame building and insulation.
We all have one, the place we gather to binge watch our favorite shows, watch a new ore favorite movie, Friday night family night, entertainment, and even a place for a nap. It's a place in our homes where everyone in the family loves to be in. The family room, TV room, theater room, I'm sure there are more names for it depending on different parts of the country.
Well, we had one of those family rooms, however, no one enjoyed being in the room. It was awful, ugly, disorganized, cluttered, incomplete, cold, depressing, and on and on. When my oldest was two, we painted the room though we didn't like the color. So we painted a second time, and even a third time. All three paint colors we were disappointed with, so we stopped and left the room as it was, incomplete. My oldest is now 17 and we have revisited this room at last.
Before I show you the before pictures, I'll let you see my vision for the room.

I started drawing ideas for the room about a year ago. I drew a couple slightly different designs, but always came back to my original idea for the wall. This is Phase 1 of the family room remodeling project. Turn a boring half basement wall into flat wall with a recessed box that can house a 65" HDTV with surround sound!
About the before photo....here it is, the awful, unorganized, cluttered family room. It also was the exercise room, there is a fireplace out of frame to the right, two worn out couches, a gaming center, a collapsing stereo cabinet, piles of DVD's and video games. It's also a side entrance to the house, which is never used as an entrance because the doors are just barely functional, all completed with carpet scraps for flooring.

See the blue taped rectangle on the far wall, that is where the recessed box will reside once Phase 1 of the project is completed.
What else are we doing with this room?
Paint the walls a color we like.
Replacing both outside doors.
Add Crown molding.
Install DriCore flooring to add a moisture barrier and reduce the coldness.
Purchase a new couch.
Build a bench/table behind the couch for more TV viewing locations.
Build a cabinet to house the entertainment components.
Build a dry bar/hutch.
Install wall speakers.
Install recessed ceiling lights.
Am I missing anything? I'm sure there is more as we go along.
I have drawn out my stud wall so it can house a recessed HDTV. A second recessed box that will have two glass shelves to display decorative items. I also need to add space for a left and right wall speaker with a center channel speaker in the middle. I need to expand power to the bottom and to the recessed box and add a panel for the speaker wires, HDMI ports, NIC, and cable. Lastly, move the light switches from the front of the wall to the side of the expanded wall next to the door.

I've noticed in this drawing, I haven't left a space for the center channel, but trust me, I will add a space for it. I'm a little bit further ahead in this project than where I am in this blog, but I will soon catch up in the coming weeks.
With that, it's time to end today's blog entry and start some demolition.
With that, it's time to end today's blog entry and start some demolition.
